Seamless Square Patterns 13: Practical Guidance for Creative Design Projects
If you have spent any time designing invitations, branding materials, or digital assets, you already know that a good pattern can transform an ordinary layout into something polished and memorable. Seamless Square Patterns 13 offers exactly that kind of creative resource—a high-resolution set of repeating square motifs designed to be dropped into projects without worrying about edges, tiling, or awkward gaps. But owning a quality pattern set does not automatically guarantee great results. How you choose, prepare, and apply these patterns determines whether your final piece looks intentional or haphazard.
This article walks through the practical considerations that make the difference between a pattern that works and one that fights against your design. Whether you are a seasoned professional or someone exploring pattern design for the first time, understanding these details saves time, reduces frustration, and helps you get the most out of Seamless Square Patterns 13.
Understanding What You Are Actually Getting
Seamless Square Patterns 13 comes as a zip file containing a single JPG at 300 dpi, measuring 5000 by 5000 pixels. That is a generous canvas that offers flexibility for both print and screen applications. But here is where a common misunderstanding creeps in: people assume that because the file is large and high resolution, it is infinitely scalable. In reality, a raster JPG has fixed pixel dimensions. Enlarge it beyond 5000 pixels and you will see softening or pixelation, especially in fine geometric details.
Knowing the resolution limits helps you plan. For print projects like bottle caps, t-shirt graphics, or jewelry packaging, 300 dpi at that size allows you to print up to roughly 16 by 16 inches at full quality. For web use, you have more than enough resolution for full-screen backgrounds, but you should still test how the pattern scales on different devices before finalizing. The fix is straightforward: work within the resolution range or, if you need something much larger, consider vector-based alternatives. For the projects this pattern set is designed for, the included file is more than capable—you just need to respect its boundaries.
Skipping the Seamless Check Creates Visible Problems
Even though the product is called seamless, not all seamless patterns behave perfectly in every software environment. Some applications handle tiling differently, and rendering engines can introduce subtle line breaks or color shifts at tile boundaries. The most common mistake is assuming the pattern will tile flawlessly without testing it in your specific program first.
Imagine you are designing a website background using the pattern. You upload the tile and let CSS or your page builder handle the repetition. What looks clean in Photoshop may show a faint seam in the browser, especially if anti-aliasing settings or browser zoom levels distort pixel boundaries. To avoid this, always create a quick test. Open the pattern in your intended application, tile it across a large canvas, and inspect the edges at 100% zoom. Look for any brightness jumps, repeating artifacts, or misaligned motifs. If you notice anything, adjust the tile placement or check your software's tile handling settings. Many applications have an option to offset tiles slightly, which can fix minor alignment issues without editing the original file.
Another overlooked detail: color profiles. The JPG in Seamless Square Patterns 13 uses a standard sRGB color space, which works perfectly for web and most print workflows. But if your design software defaults to Adobe RGB or another color space, the pattern may shift in hue or contrast when placed alongside other assets. Matching your document color profile to the pattern file eliminates this issue entirely.
Ignoring Context When Applying Patterns Hurts Readability
A beautiful seamless square pattern can overwhelm a design if applied without considering the content sitting on top of it. This is especially true for invitations, cards, and website headers where text needs to remain legible. The mistake is straightforward: picking a pattern based solely on how it looks alone, rather than how it supports the other elements on the page.
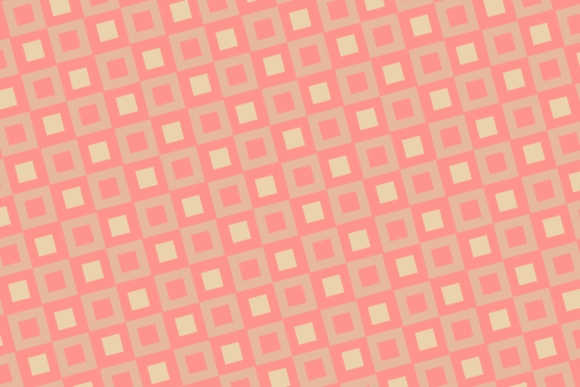
Seamless Square Patterns 13 includes geometric, symmetrical motifs that tend to have medium to high visual density. When you place text directly over these patterns without enough contrast or spacing, readability suffers. The solution is not to abandon the pattern but to use it deliberately. Consider these approaches:
- Reduce opacity. Drop the pattern layer to 20–40% in your design software so it becomes a subtle backdrop rather than a competing element.
- Use overlay areas. Place a semi-transparent color block or a blurred shape behind your text to create a clean reading zone. This works especially well for invitation details, quote cards, or website headlines.
- Adjust scale. Scaling the pattern down makes the repeats smaller and less visually dominant, which can improve text legibility without losing the pattern effect.
- Choose the right motif for the right application. If you are designing a t-shirt, the pattern may serve as the main graphic, so density and scale become part of the aesthetic. For a cell phone cover or nail wrap, the pattern might be the entire design, so you have more freedom with intensity.
Testing with real content—actual text, actual product mockups—before finalizing saves you from discovering legibility issues after printing or publishing.
Overlooking File Format Limitations for Specific Projects
The single JPG format in Seamless Square Patterns 13 is convenient, but it is worth understanding what it does not offer. JPG does not support transparency, which matters if you want to place the pattern over a colored background or use it as a layered element in a composite design. If your invitation layout requires the pattern to blend seamlessly into a gradient or a colored card base, the opaque white or black background of the JPG may create an unwanted rectangular boundary.
How do you work around this? In most design applications, you can remove the background manually using selection tools, or you can set the blend mode of the pattern layer to Multiply or Screen to drop out white or black backgrounds respectively. This works well as long as the pattern itself does not contain pure white or pure black that needs to remain visible. If transparency is critical to your workflow, consider converting the pattern to a PNG with a transparent background inside your editing software before placing it into your project. It adds a small step, but it gives you much more flexibility for layered compositions like digital albums, hybrid paper crafts, or complex website designs.
Also, because the file is a JPG, repeated saving and re-saving can degrade quality over time. Keep the original zip file intact and work from copies. That way, you always have a clean, full-resolution master to return to if needed.
Underestimating the Importance of Pattern Orientation and Layout
Square patterns are symmetrical by nature, but how you orient and position them within your design changes the entire feel of the final piece. A mistake that shows up frequently in user-submitted designs is placing the pattern in a way that creates uncomfortable visual lines or cut-off motifs at page edges. For example, when designing a bookmark, a business card, or a digital album cover, the pattern may end abruptly at the boundaries of the shape, leaving half a square visible and disrupting the overall flow.
Avoid this by positioning the pattern so that the repetition starts at a natural break point. Shift the pattern layer slightly until the edges align with the boundaries of your canvas or object. Some design programs have an option to align pattern fills to the object's bounding box, which automates this process. For physical products like bottle caps or magnets, consider how the pattern wraps around a curved or circular surface. The same pattern can look completely different when rotated 45 degrees or offset by half a tile. Experiment with multiple orientations before locking in your final layout.
Another point: because Seamless Square Patterns 13 is a single pattern tile, you have the freedom to rotate, flip, or mirror it to create variation. If you need two different pattern effects within the same project—say, a subtle version for the main background and a denser version for an accent panel—you can duplicate the file and apply different scaling or rotation to each copy. This gives you more mileage from one asset without needing a second pattern set.
What to Check Before Downloading or Buying
Before you invest time in any pattern set, verify a few details to make sure it fits your workflow. The product listing for Seamless Square Patterns 13 clearly states the resolution, format, and dimensions, but here is what those numbers actually mean for your specific use case:
- 300 dpi at 5000 x 5000 px means print projects up to about 16 inches square stay crisp. If you are designing large banners or wide-format signage, you may need to scale carefully or consider a vector alternative.
- JPG format means universal compatibility with almost every design program, but no transparency. Plan accordingly if your project relies on layering.
- Single file means you get one pattern tile. That is usually enough for a cohesive design system, but if you need multiple variations or colorways, you would need to create those yourself using adjustment layers. This is not a limitation if you have basic editing skills, but it is worth knowing upfront.
Also, check your own software capabilities. Most modern applications handle 5000-pixel images without issue, but older or less powerful devices may struggle with previews or real-time rendering. Save and close other memory-intensive files while working with large pattern assets.
Practical Advice for Getting Better Results
Instead of treating Seamless Square Patterns 13 as a one-click solution, approach it as a flexible raw material that benefits from intentional setup. Here are some tactics that experienced designers use routinely:
- Always work with a non-destructive workflow. Place the pattern as a smart object or a linked file so that you can replace or adjust it later without rebuilding your entire design.
- Create a pattern swatch in your design application. Instead of pasting the large JPG directly into every project, define it as a pattern fill. This lets you scale, rotate, and apply it across multiple objects consistently.
- Use color adjustments strategically. The pattern may come in a specific palette. By applying a Hue/Saturation or Color Lookup adjustment layer, you can shift the colors to match your brand or project theme without altering the original file.
- Test on a mockup first. Before sending an invitation design to print or finalizing a t-shirt layout, place the pattern on a mockup template. This reveals issues with scale, alignment, and overall visual impact that are hard to catch in a flat document view.
Even something as simple as changing the pattern's background color from white to a soft neutral can completely change how it reads in a real-world context. Small adjustments yield disproportionately large improvements.
Making the Pattern Work Across Different Project Types
One of the strengths of Seamless Square Patterns 13 is its versatility across media. Invitations, bottle caps, t-shirts, phone cases, website backgrounds, cards, jewelry packaging, magnets, digital albums, paper crafts, nail wraps—these are all legitimate applications. But each medium has its own constraints, and the pattern needs to be adapted accordingly.
For print-on-demand products like t-shirts or cell phone covers, test the pattern at actual product size to make sure the repeats are not too small or too large. A pattern that looks balanced on a computer screen may appear overly busy on a small nail wrap or too sparse on a large tote bag. Similarly, for digital products like website backgrounds, check how the pattern performs at different screen resolutions. A pattern that tiles beautifully at 1920 pixels wide may show visible repetition on a 4K display if the tile is too small. Scaling the pattern up slightly reduces the repetition frequency and creates a more sophisticated look.
For paper crafts and digital albums, consider how the pattern interacts with cuts, folds, and layered paper. If you are printing the pattern and then cutting shapes out of it, line up the cuts so that prominent motifs are centered or framed nicely. A little forethought in positioning elevates the craft from good to exceptional.
Ultimately, Seamless Square Patterns 13 is a capable, high-quality asset. The difference between a design that looks like a template and one that feels custom comes down to the decisions you make during setup and application. By testing early, adjusting for context, and respecting the file's technical boundaries, you can use this pattern set to create professional work that stands out across any medium.